Authenticate end-users in Strapi with external providers


At HipSquare, we are big fans of Strapi, a headless content management system. We use Strapi for all kinds of applications where a rather simple backend is required to store and retrieve data. In doing so, we most often need to authenticate users of apps before they can access Strapi data.
Strapi brings a basic management for end-users. As an admin, you can create them, and Strapi offers an API to authenticate users with a username and password.
This works nicely for small, independent applications. However, for apps that run in an enterprise context and have more than a handful of users, user management in Strapi is not very practical. Most likely, users will already have a user account with their organization, and will want to reuse it to login to the app.
OAuth
One common strategy to achieve that is by employing OpenID Connect (OIDC). Using OIDC, users can login with an identity provider (IdP) that is able to verify the user's login credentials (e.g. your company's user management system, such as Auth0 or Azure Active Directory). Another application (e.g. your backend) can then verify their identity without having to verify the actual login. This is useful to decouple authentication and app-specific business logics: Authentication is taken over by the identity provider, everything else by the app itself.
You are probably familiar with OIDC already: Whenever you see a "Login with Facebook" or a "Login with Google" button, the underlying protocol is OIDC. That's the same experience we aim for.
The flow
So how do users actually login? Let's look at the underlying authentication flow in a simplified way:
- Your frontend applications checks whether or not a users is logged in. To do so, it initiates a REST call to a backend endpoint.
- If the user is not logged in, they are redirected to a backend URL in their browser.
- The backend forwards the user to the IdP's login page. The user logs in with their credentials.
- The IdP forwards the user back to the backend with some additional information attached to the URL. This information allows the backend to retrieve an access token and an identity token from the IdP. The identity token is proof of the user's identity.
- The backend now opens up a session for the user, which makes subsequent requests authenticated. The user is now logged in.
Implementing OIDC for end-users with Strapi
Next, we will set up an example Strapi backend that provides endpoints for authentication via OIDC. We will use Auth0 as an identity provider, as it allows to easily set up a new account and OIDC client.
Create a new Strapi app
Start by creating an empty boilerplate Strapi app:
yarn create strapi-app oidc-test --quickstartTo implement OIDC, we will use our HipSquare Strapi Keycloak Plugin which takes over the heavy lifting:
cd oidc-test
yarn add @hipsquare/strapi-plugin-keycloak
Create an Auth0 application
Next, create an Auth0 account if you don't already have one. Log in to Auth0 and follow the Auth0 guide to create a new application. You can use an arbitrary name, we used "strapi". Pick "Regular Web Applications" when asked for the application type.
Once the application is created, enter http://localhost:1337/keycloak/callback as an allowed callback URL in the application's settings:

Configure Strapi
Now, configure Strapi to enable the plugin and for the plugin to be connected to Auth0.
Create a new file config/plugins.js:
module.exports = {
  keycloak: {
    enabled: true,
  },
};
Create a second file config/keycloak.js:
module.exports = {
clientId: "[your client ID]",
clientSecret: "[your client secret]",
authEndpoint: "[your domain]/authorize",
tokenEndpoint: "[your domain]/oauth/token",
userinfoEndpoint: "[your domain]/userinfo",
logoutEndpoint: "[your domain]/v2/logout",
redirectUri: "http://localhost:1337/keycloak/callback",
redirectToUrlAfterLogin: "http://localhost:1337/keycloak/isLoggedIn",
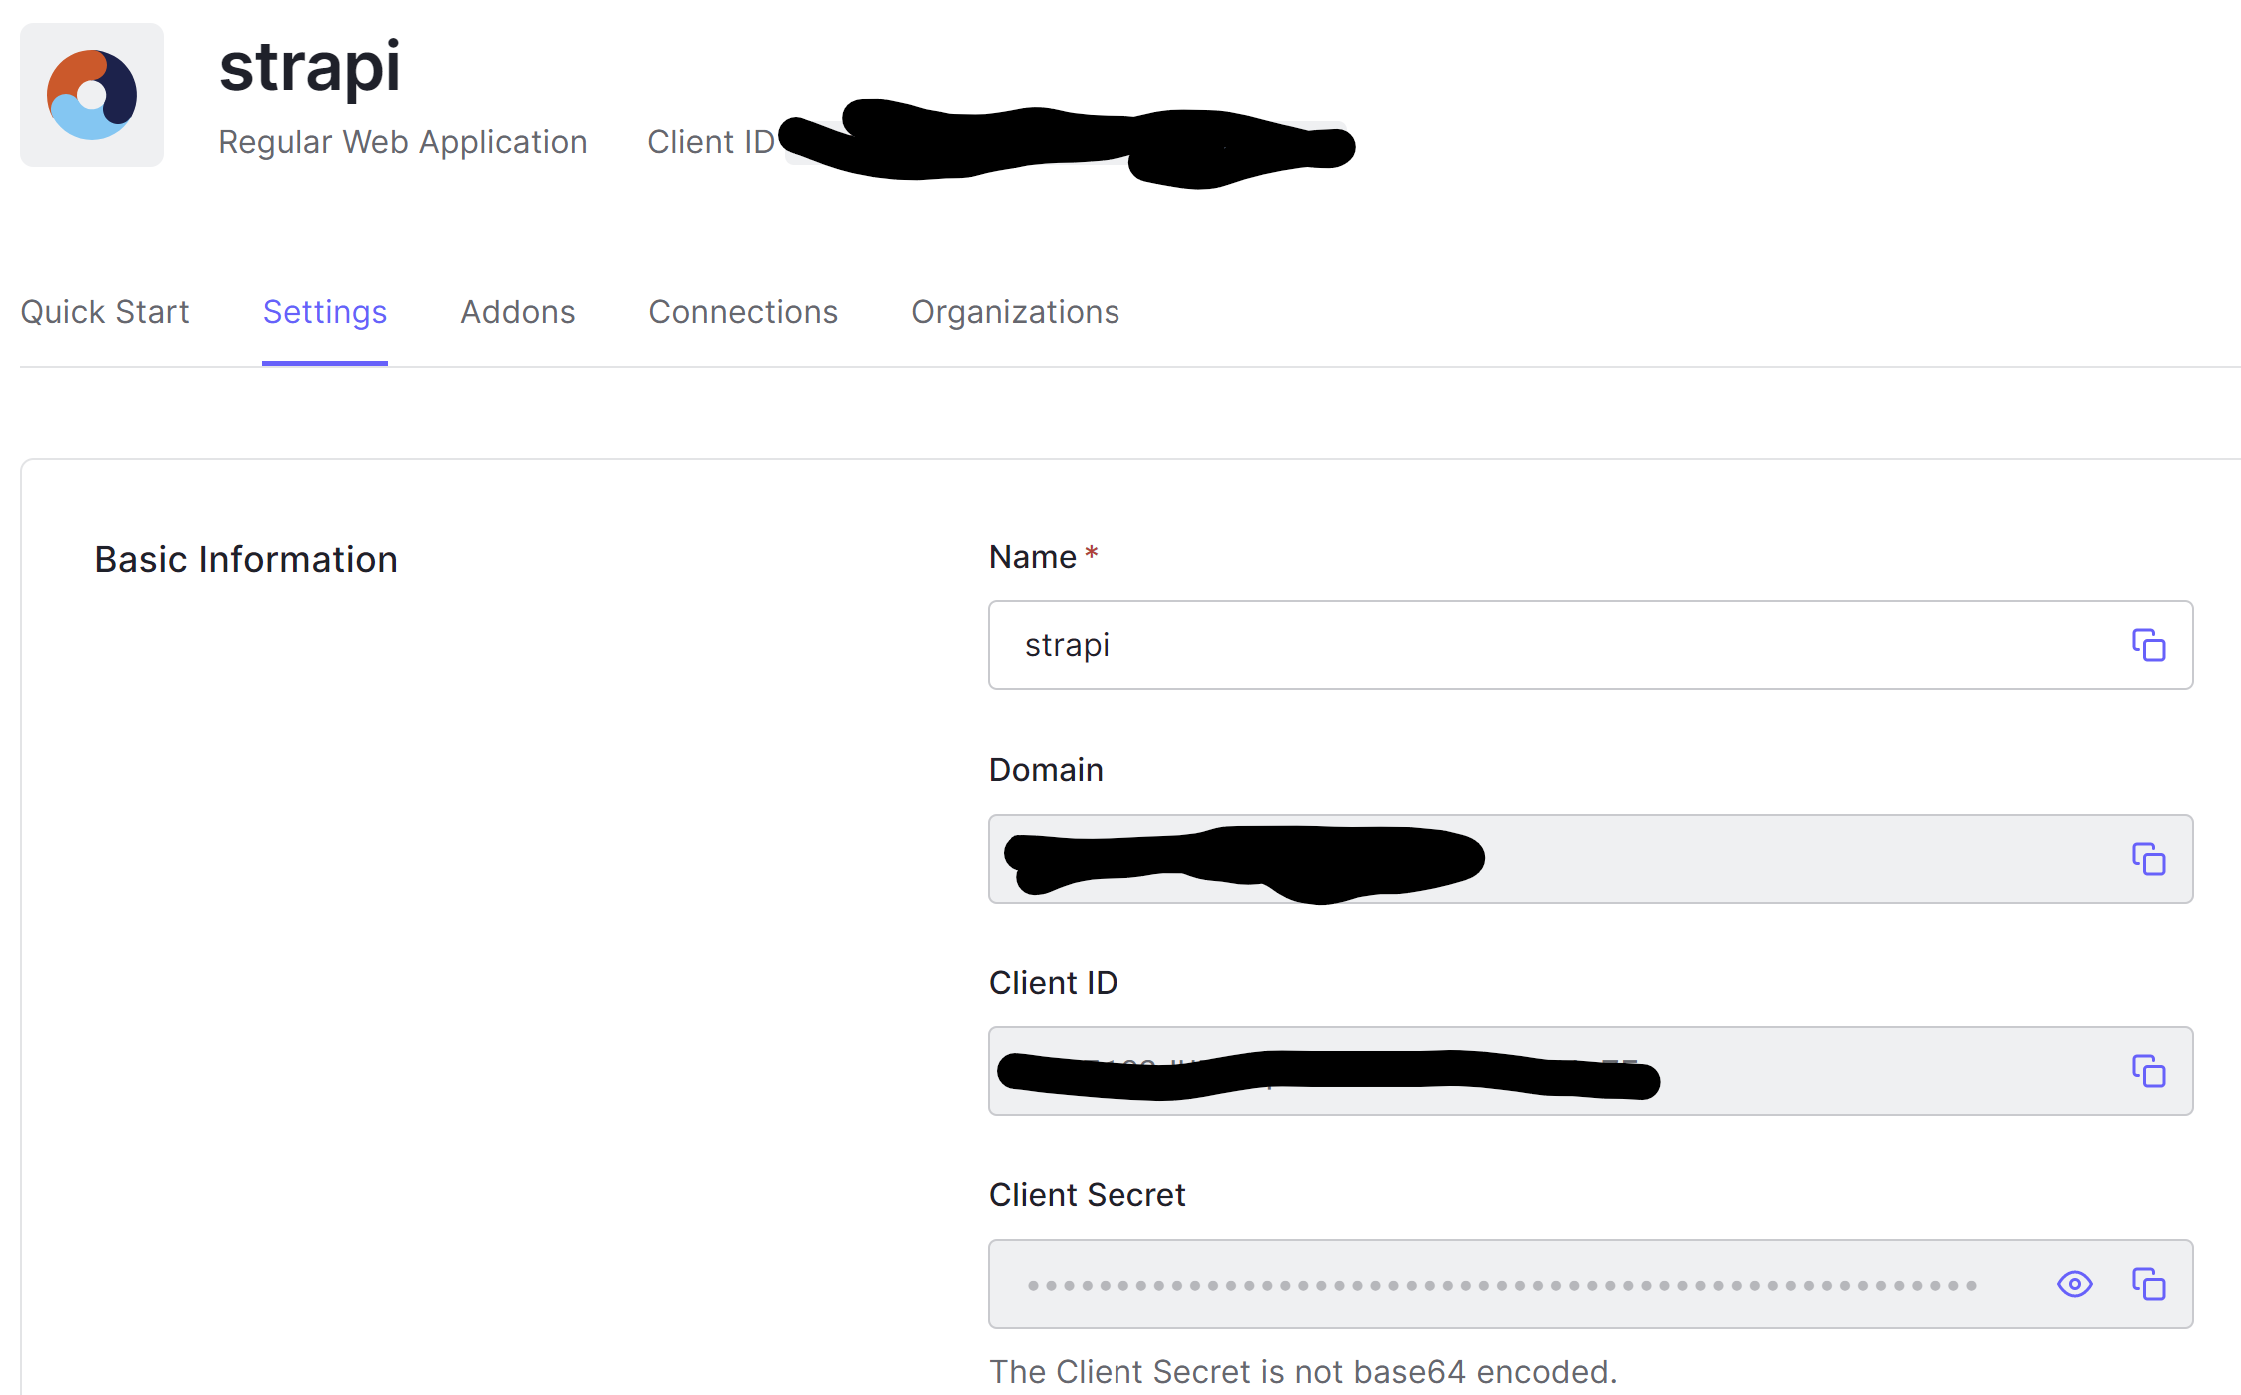
};You can gather the required data from the application settings page in Auth0:
Add a new Auth0 user
Make sure you have a test user by following the Auth0 guide.
Give it a spin
Congratulations, you are all set! Start Strapi and test the authentication flow:
yarn developMake sure you are not currently logged in by opening http://localhost:1337/keycloak/isLoggedIn. The endpoint returns true if you are logged in and false if not.
Now open http://localhost:1337/keycloak/login to trigger the authentication.
You should be immediately redirected to Auth0. Login with your test user. You should now be redirected back to the backend and end up back on the isLoggedIn endpoint. This time, it should return true.
Open http://localhost:1337/keycloak/profile. It will return a JSON representation of your user profile at Auth0.
Next steps
Congratulations, you have just configured Strapi to authenticate your end-users with an OIDC provider.
A usual next step would be to implement the login functionality in your frontend app that communicates with Strapi. If you use React, we got you covered with our @hipsquare/react-strapi-keycloak-auth-context package. Otherwise, you can easily use the endpoints provided to achieve that.
Also, now that your users are authenticated, you will want to use that to authorize them. You can easily protect routes using a Strapi middleware and access the user profile in your Strapi code to perform more fine-granular authorization.
You can use the plugin for any OIDC-supported identity provider. We work a lot with Keycloak, for example, and have successfully used it with Azure Active Directory.